HexoBlog Development Log (Part 1/4)
This article documents and explains how my HexoBlog was deployed to Github Pages step by step, from zero to present, welcome for you to reference. If your are not at my Blog, here is My HexoBlog.
Chapter:
Part 1 - Preparation
Having a Git account and repositories for blog
Install nodejs and Git
Install and Initialize Hexo Blog
Part 2 - Basic configuration and blog deployment
- Basic Blog configuration
- Deploy a blog for the first time with GitHub
- Install blog theme - “Butterfly”
- Develop a own picture hosting (PicGo + GitHub)
Part 3 - Blog maintain and GitHub version control
- Use of Hexo command
- Deploy a blog with theme
- Push source file to GitHub
Part 4 - Advanced configuration on “Butterfly” theme
- Config blog attributer and Customize blog style with “Butterfly”
Having a GitHub account
Skip this step if have a GitHub account already.
Go to GitHub and then “sign up”.
Sign up with eMail, password and username.
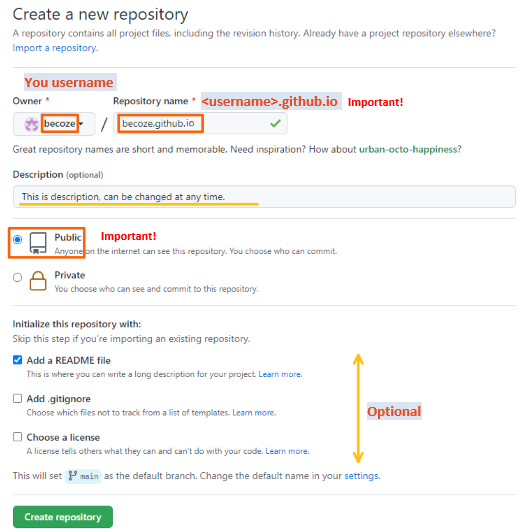
Create “New Repo”: Click the green “New”;
Install nodejs and Git
Link: nodejs download
File download: download .msi for Window; .pkg for macOS.
Download setting: keep licking “Next” (remain all default installation)
Verify download: run
node -von command prompt. Installation success when it return the version number.1
2> node -v
v16.14.0
Link: Git download
File download: “64-bit Git for Windows Setup”
Download setting: keep licking “Next” (remain all default installation)
Verify download: run
git versionon command prompt. Installation success when it return the version number.1
2> git version
git version 2.35.1.windows.2
Install and Initialize Hexo blog
Please always refer to Hexo Official doc: Official Hexo doc EN and Official Hexo doc CN
Video tutorial CN:
- YouTube: 周三Tech - Hexo教程第二期 安装与使用;
- Bilibili: 周三Josan - Hexo系列教程第二期 安装与使用 720P
Video tutorial EN:
Create a new empty folder with any name at the appropriate path, this folder will become your blog source folder. e.g. “HexoBlog”, path
D:\HexoBlog.Use of Git terminal: Open the blog source folder, right click select Git Bash to enter the terminal.
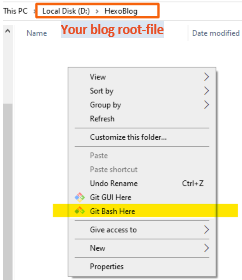
Install Hexo: at blog root directory /HexoBlog
1
$ npm install -g hexo-cli
Initialize blog: at blog root directory /HexoBlog
1
$ hexo init HexoBlog
Generate blog file: at blog root directory /HexoBlog
1
2
3$ hexo g
or
$ hexo gerarateDeploy the HexoBlog locally: at blog root directory /HexoBlog,
1
2
3$ hexo s
or
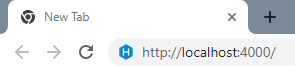
$ hexo serverOpen
http://localhost:4000/with any browser to view the blog locally. (Chrome as example)